

Maintaining your heat pump doesn’t have to be an intimidating task. With a few simple DIY tips, you can keep your system running efficiently and extend its lifespan. From checking your thermostat settings to inspecting ductwork for leaks, there are practical steps you can take. Let’s explore these essential tips to help guarantee your heat pump operates smoothly throughout the seasons.
Check the Thermostat Settings
Before making more complex repairs, check your thermostat settings. It might seem simple, but incorrect settings can lead to unnecessary problems with your heat pump.
First, verify it’s set to “heat” if you’re trying to warm up your home. Double-check the temperature setting; if it’s set too low, your system won’t kick in as expected.
Next, look for any scheduling features—sometimes, thermostats are programmed to adjust temperatures at certain times. If you’ve accidentally set it to a lower temperature during the day, that could explain the chill in your home.
Also, replace old batteries if the thermostat isn’t responding. A dead battery can leave your heat pump inactive.
Finally, confirm that the thermostat is level and clean from dust, as debris can interfere with its readings. These simple checks can save you time and help maintain your home’s comfort. Additionally, consider consulting with experienced technicians for further assistance if problems persist.
Inspect the Circuit Breaker
The circuit breaker could be the culprit when your heat pump isn’t working.
First, check if the breaker has tripped, which is often an easy fix. If it has, simply reset it and see if that gets your heat pump back in action. Additionally, ensuring your heat pump is in top working condition can prevent future issues and maintain energy efficiency.
Check for Tripped Breaker
One of the first things you should do when your heat pump isn’t working is check for a tripped breaker.
Locate your circuit breaker panel and inspect it closely. If you notice any switches in the “off” position or if one appears to be in the middle, it’s likely tripped. A tripped breaker can prevent your heat pump from getting power, leading to lack of heating or cooling.
Don’t forget to check if any other appliances are affected; this could indicate a larger issue. If you find a tripped breaker, note which circuit it’s tied to before proceeding.
Addressing this simple issue can sometimes restore function to your heat pump without requiring further repairs.
Resetting the Circuit Breaker
If you found a tripped breaker while checking your circuit panel, resetting it’s your next step.
First, locate the tripped breaker; it’ll typically be in the “off” position or not aligned with the others. Firmly push it to the “off” position, then switch it back to “on.” Listen for a click, indicating it’s reset.
Next, check your heat pump to see if it’s operational again. If it trips again immediately, don’t keep resetting it; this signals a deeper issue that needs professional attention.
Consider reaching out to Best Virginia Heating & Cooling for an expert diagnosis. They’ll guarantee your system runs safely and efficiently, keeping your home comfortable year-round.
Clean or Replace Air Filters
Regularly cleaning or replacing your air filters is essential for maintaining your heat pump’s efficiency and longevity. Clogged filters restrict airflow, forcing your system to work harder and potentially leading to costly repairs.
Check your filters every month, especially during peak heating and cooling seasons. If they look dirty or have visible dust buildup, it’s time to clean or replace them.
Cleaning reusable filters is simple—just rinse them with warm water and let them dry completely before reinstalling.
For disposable filters, follow the manufacturer’s guidelines on replacement frequency, usually every 1 to 3 months. Regular maintenance of air filters ensures optimal HVAC performance, which is crucial for keeping your home comfortable and energy-efficient.
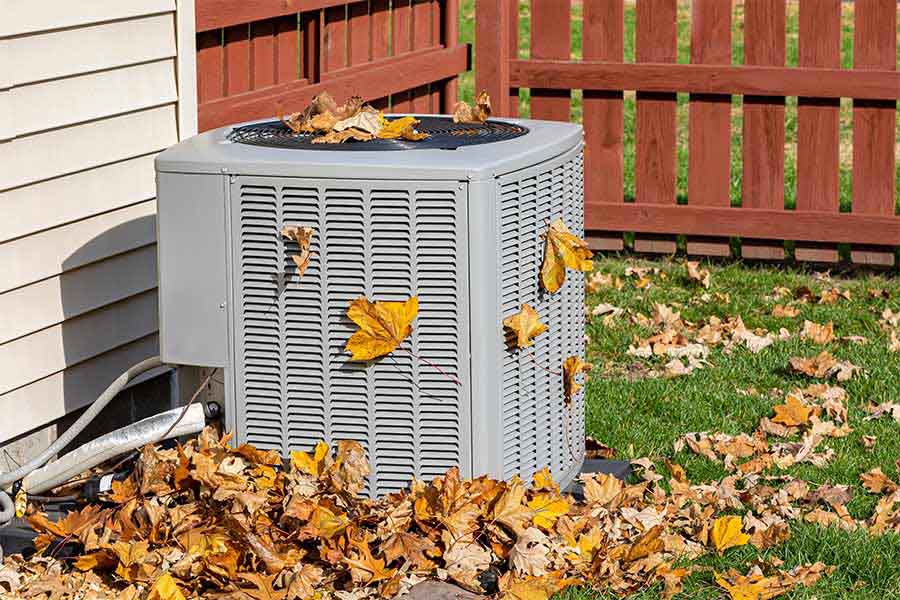
Clear Debris From Outdoor Unit
Clearing debris from the outdoor unit is crucial to guaranteeing your heat pump operates efficiently. Regular maintenance helps prevent operational issues and keeps your system running smoothly.
Start by checking for leaves, dirt, and branches that may have accumulated around the unit. Remove any large debris by hand, but be cautious not to damage any components.
Next, use a soft brush or a vacuum to clean the fins of the condenser gently. This guarantees proper airflow and prevents overheating. If there’s any built-up grime, a mild detergent mixed with water can help; just be sure to rinse it off thoroughly.
Also, make certain there’s at least two feet of clear space around the unit to promote airflow. By taking these steps, you can enhance the performance of your heat pump and extend its lifespan, ensuring comfort in your home all year round. Regular cleaning and maintenance are essential for optimal air handler functionality, which contributes to overall system efficiency.
Examine Ductwork for Leaks
When checking your heat pump, don’t overlook the ductwork; leaks can seriously affect your system’s efficiency.
Start by identifying common leak areas, then use duct tape for quick fixes.
Finally, make sure to insulate your ducts properly to maintain ideal airflow and comfort in your home.
Identify Common Leak Areas
While maintaining your heat pump, it’s crucial to examine your ductwork for leaks, as even small gaps can greatly impact efficiency.
Start by checking the connections between duct segments, especially at joints and elbows where leaks often occur. Look for signs of dust or debris accumulation, which can indicate air escaping.
Don’t forget to inspect the areas where ducts connect to vents and the heat pump itself. Pay special attention to unconditioned spaces like attics or basements, where temperature differences can cause condensation and leaks.
If you find any suspicious areas, mark them for future repairs. Identifying these common leak areas early can help maintain your heat pump’s performance and keep your home comfortable year-round.
Use Duct Tape
After identifying common leak areas in your ductwork, it’s time to address those issues. Duct tape can be a quick and effective solution to seal leaks temporarily.
Start by cleaning the area around the leak to guarantee proper adhesion. Then, apply the duct tape tightly over the leak, making sure it covers the entire area. For larger gaps, you might need to layer the tape for a stronger seal.
Keep in mind that duct tape isn’t a permanent fix, so plan to replace any damaged sections of ductwork in the future. Regularly check your ductwork to maintain efficiency and comfort in your home.
With these simple steps, you’ll help your heat pump work more effectively.
Insulate Ducts Properly
To guarantee your heat pump operates efficiently, it’s essential to insulate your ducts properly and examine them for leaks.
Leaky ducts can waste energy and reduce your comfort. Here’s how to tackle this:
- Inspect visually: Look for any visible gaps or damaged areas in your ductwork.
- Use smoke or incense: Run smoke along the seams; if it moves, you’ve found a leak.
- Seal gaps: Use mastic sealant or metal tape to seal any leaks you discover.
- Insulate exposed areas: Wrap ductwork with insulation where it’s exposed to unconditioned spaces.
- Check airflow: Confirm registers are open and unobstructed for ideal airflow.
Ensure Proper Insulation
Proper insulation is essential for maximizing your heat pump’s efficiency and reducing energy costs.
Inspect your home for drafts, especially around windows, doors, and electrical outlets. Sealing these gaps with caulking or weatherstripping can prevent heated air from escaping.
Next, check your attic and walls for adequate insulation levels. If your insulation is thin or settled, consider adding more to keep your home cozy during colder months.
Remember, the recommended R-value varies by climate, so ensure you meet local standards.
Also, don’t overlook your crawl spaces and basement; insulating these areas can greatly improve your heat pump’s performance.
Finally, verify that your ducts are well-insulated to prevent heat loss.
Verify the Heat Pump Is Level
To keep your heat pump running efficiently, you need to verify that it’s level.
An unlevel unit can lead to poor performance and even damage, so grab a level tool to check it out.
If it’s off, adjusting it’s a straightforward fix that can save you headaches down the line.
Importance of Leveling
A well-functioning heat pump relies on being perfectly level, as even a slight tilt can lead to inefficiency and potential damage.
When your heat pump isn’t level, it can affect its overall performance and lifespan.
Here’s why leveling is essential for you:
- Guarantees ideal airflow and efficiency.
- Reduces the risk of compressor failure.
- Minimizes vibrations and noise.
- Prevents refrigerant leaks.
- Enhances overall comfort in your home.
Tools Needed for Verification
You can easily verify if your heat pump is level using just a few essential tools. First, grab a standard level tool—this is your main instrument for checking alignment. Place the level on top of the heat pump unit and look for the bubble in the center. If it’s off-center, your unit may not be level.
Next, you’ll need a measuring tape to check the height of each corner of the heat pump. Measure from the ground to the base of the unit, guaranteeing all corners are equal.
Finally, keep a wrench handy in case you need to adjust the mounting pads later. With these tools, you’re ready to make sure your heat pump is properly leveled for peak performance.
Adjusting the Heat Pump
Before you start adjusting your heat pump, it’s crucial to confirm that it’s level, as an uneven unit can lead to inefficiencies and potential damage.
Follow these steps to guarantee your heat pump is properly positioned:
- Use a level tool to check across the unit.
- Adjust the legs or base as needed to achieve a level position.
- Check the surrounding area for any debris or plants that might be affecting stability.
- Re-check the level after making adjustments to verify accuracy.
- Secure the unit if necessary to prevent future movement.
Look for Refrigerant Leaks
When troubleshooting your heat pump, keep an eye out for refrigerant leaks, as they can seriously impact your system’s efficiency.
Start by checking the copper lines and connections for any signs of wear or damage. Look for oily spots, which can indicate a leak. If you notice hissing or bubbling sounds, that’s another sign you may have a refrigerant issue.
To find smaller leaks, you can use soapy water. Mix dish soap with water and apply it to the suspected areas. If bubbles form, you’ve likely found a leak.
Once you’ve identified the leak, avoid trying to fix it yourself, as handling refrigerant requires specialized training and certification. Instead, contact a professional.
Regular maintenance can help prevent leaks, so consider scheduling an annual check-up with a trusted HVAC technician to keep your heat pump running smoothly and efficiently.
Test the Emergency Heat Function
To guarantee your heat pump operates effectively during colder months, it’s crucial to test the emergency heat function. This feature kicks in when your primary heating system can’t keep up, providing you with backup warmth.
Here’s how to verify it’s working properly:
- Set your thermostat to the emergency heat setting.
- Listen for any unusual noises coming from the heat pump.
- Check if the unit’s airflow is warm and steady.
- Monitor your energy bill for any unexpected spikes.
- Confirm the emergency heat indicator light is on.
If you notice any issues during this test, it might be time to call in a professional.
Regularly checking this function can keep you cozy and comfortable when winter hits hard. Don’t wait until it’s too cold—being proactive can save you headaches down the line!
Schedule Regular Maintenance
Testing your emergency heat function is just one part of keeping your heat pump running smoothly.
Scheduling regular maintenance is vital for guaranteeing your system operates efficiently and lasts longer. By having a professional check your heat pump at least once a year, you can catch small issues before they turn into costly repairs.
During maintenance, your technician will clean the coils, check refrigerant levels, and inspect electrical components.
You should also change your air filters every few months to maintain good airflow and indoor air quality.
Don’t wait until you notice a problem; proactive maintenance helps avoid inconvenient breakdowns.
If you’re unsure where to start, consider signing up for a maintenance plan with a trusted local company like Best Virginia Heating & Cooling. They’ll tailor their services to fit your needs and make sure your home stays comfortable year-round.
Conclusion
By following these simple DIY heat pump repair tips, you can keep your home cozy and your system running smoothly, like a well-tuned orchestra. Remember, a little proactive care goes a long way in ensuring efficiency and longevity. So, take charge of your heat pump maintenance and enjoy comfort year-round. Don’t wait for winter chills to remind you—start today and keep your home warm and inviting!